Showing posts with label Mexican. Show all posts

Tuesday, May 17, 2011

Taco Rice Casserole

Sorry I've been a little MIA lately.  My husband was out of town for 2 weeks for training - uhhh...I didn't cook much while he was gone.  The kids and I have been a little under the weather lately too.  I think we're getting over everything and it's so nice having the hubby back!

I grew up on this casserole. It is so easy to make and a great recipe to use up leftover rice. I don't really know why it's called a casserole since you don't put it into a 9x13 pan and bake in the oven. Maybe it should be called Taco Rice Skillet. Anyways, enjoy!

Today's Ingredients:
1 pound ground beef
1 can tomato soup
1 cup shredded cheddar cheese
1 can diced tomatoes (drained)
3 cups cooked rice
1 8 oz. can corn
1 package taco seasoning mix
1/2-1 teaspoon salt


Over medium high heat saute ground beef until done.  Drain excess
fat if necessary.


Lower heat to medium and add taco seasoning, tomato soup, cheese
and tomatoes.  Heat through until cheese melts.

You can definitely add more cheese if needed to suit your family's
tastes.  Also, if you have little kids or are sensitive to heat, you might
want to scale back on the taco seasoning just a bit. I only added 3 T.
(1 pkg is 4) and Matthew and Isabelle still thought it was "hot".

Also, I hate big chunks of tomato in casseroles like this so I took
the tomatoes after draining them and chopped them a bit more.


Once the cheese is melted stir in the rice, salt, and corn.

Matthew HATES rice so last night when he saw dinner he said
"is this pasta?"  I said yes so he would try it.  He has a mental block
about some foods and I knew he wouldn't try it if he knew it was
rice.  Of course, he liked it and never even commented that it was
rice.  Just getting him to try something new is usually a pain and
causes lots of gnashing of teeth around here, but he ate it easily
AND liked it even if he thought it was hot.

The other night he was refusing to try pineapple and we almost
had to tie him down to try it.  Finally after threatening time-out
he tried it and guess what - LOVED IT!  We knew he would
and now he has "unlocked" pineapple (like you would do in
the star wars wii game).


Cook through and serve.  See...that was super easy to make right?


This is one of my husband's favorite meals and he loves eating it


Tuesday, May 3, 2011

Cinco de Mayo: Chicken Verde Enchiladas

I really didn't like the red sauce/flour tortilla enchiladas that I grew up with and didn't know there were other kinds out there. At some point I stumbled upon green sauce/corn tortilla enchiladas. These are by far my favorite kind and one of the first recipes I tried out of my Mexican cookbook once I got it a few years ago. 

The recipe below ISN'T HARD, but it is time consuming.  The great part is you can make the chicken and sauce a few days ahead (like today or tomorrow) and assemble the enchiladas the day of.  I've eaten Verde sauce out of the can and this homemade sauce blows away the canned kind.  Yes, it takes time but I can tell you these enchiladas are restaurant worthy. 

We had a dinner party a few weeks ago for high school friends of my husband and I served these.  They all went to a concert the next day together (I elected not to attend) and my husband said they talked about dinner and were raving that they would have been gotten their monies worth if they had gotten them at a restaurant.

If you are looking for other things to serve at Cinco de Mayo you can try these recipes too:
Creamy Rice Casserole
Mexican Shredded Beef
Red Rice and Guacamole

Today's Ingredients:
FOR THE SHREDDED CHICKEN
4 boneless chicken breasts
3 cups chicken stock
1/2 onion, chopped
3 garlic cloves, minced
1 teaspoon dried oregano, preferably Mexican
1/2 teaspoon salt
2 bay leaves

TO MAKE THE ENCHILADAS
2 1/2 cups Tubac Chile Verde (see below)
1 cup Crema (see below), or creme fraiche or sour cream
Vegetable Oil (for frying)
12 corn tortillas
8 oz. Monterey Jack, grated

TUBAC CHILE VERDE
2-3 tablespoons olive oil
1 large onion, chopped
3 garlic cloves, minced
2 tablespoons all-purpose flour
1 1/2 cups (about 10) roasted mild green chile, preferably
  New Mexican or Anaheim
8 oz. husked tomatillos, boiled in water until soft
1 1/2 cups chicken stock
1 teaspoon salt, or more to taste

CREMA
1 cup whipping cream (preferably not ultra-pasteurized)
2 tablespoons buttermilk

In a small, nonreactive bowl, combine both ingredients.  Cover the bowl

loosely, and let it stand at room temperature for 8-24 hours, until the cream
is thickened and tart.  Stir the crema well, cover it, and refrigerate it.  Use
it as needed.  Crema keeps for up to 10 days.
Crema - It tastes pretty similar to sour cream, but not quite as tart and is
thinner.  I couldn't find non ultra-pasteurized whipped cream so I made 
the Crema with it and it turned out good so use that if that's all you can find. 
If you don't want to make crema, just use the sour cream - it will be just fine. 

SHREDDED CHICKEN


First you need to get the shredded chicken cooking.

In a large stockpot bring the chicken and all of the shredded chicken
ingredients to a boil.  Reduce the heat to a low simmer and cook the
chicken until cooked through and very tender, 25-30 min.  Let the
chicken cool for a few minutes in the liquid.  Remove the breasts to a
plate and let them sit for a few minutes, until cool enough to handle. 
Shred into bit sized pieces.

This can be prepared 1-2 days beforehand.  Also, just strain the broth
and use it again.  It makes a great chicken stock to use in other recipes.

TUBAC VERDE SAUCE

If you've never used a tomatillo this is what they look like.  Pick ones
that feel a little firm and their "skin" is pretty tight on them.  You'll bring
them home and peel the skin off.  They'll be pretty sticky so wash them
well before boiling them.  You don't need to boil them long, just until they
are soft - about 4-5 min.


I didn't get a picture of my roasted chilies as my hubby roasted them the
night before.  Roast them over medium heat until they are charred slightly
char on all sides.  Once they are all roasted, put them into a plastic bag for
about 10 min. - this helps loosen the skin.  I pull off the tops, cut it down
the middle and clean the seeds out.  Flip it over and peel the skin off.
Roughly chop the chilies and then put the boiled tomatillos and chiles
in a food processor and pulse until it's just roughly combined.  I like
to leave chunks in my sauce.

Ok, let's get the rest of the sauce started.

Heat the oil over medium heat.  Add the onion and saute until well softened,
about 5 minutes.  Stir in the garlic and saute for an additional minute.

Add the flour and continue cooking for another 1-2 minutes.


Mix in the chile/tomatillo mixture.

Pour in the stock and add the salt.  Bring the mixture to a boil.  Reduce the
heat to a low simmer and cook for about 15 min., until thickened but still
very pourable.

The sauce keeps, refrigerated, for about 5 days and freezes well.

ASSEMBLING THE ENCHILADAS

Preheat oven to 350. Grease a 9x13 pan. 
In a bowl combine the 2 1/2 cups verde sauce with
1 cup crema or sour cream.  Spread about 1/2 cup of the sauce thinly in
the baking dish.

The first thing you'll want to do is cook up your tortillas.  I forgot to take a
picture of cooking the tortillas, but heat about an 1/2-1 inch of vegetable
oil in a pan.  Take your tortillas and just literally put in the tortilla in the oil
and then flip it over and take it out.  Cook it too much and now you have
a tostada and it will be too crisp to work with.  I sandwich each
tortilla in its own layer of paper towel to get all the excess oil off I can.  

I've tried to make this dish without doing this to the tortillas and
they just break and fall apart.  The frying makes the tortillas stronger
so they don't split in the rolling or cooking process.   


Ok we are ready to assemble these bad boys. 
Dip a tortilla into the sauce.  Top it with about 1/3 cup of chicken.  I am not that
precise when putting these together.  I just grab a handful of chicken that looks
to be the right amount.  I always seem to have lots of chicken leftover
AND my enchiladas are really full.

Add about a tablespoon of cheese.  Again I'm not precise here and
just add a little cheese.

Roll the enchiladas and place seam side down in your pan.  You can
fit about 5 in each row and then you'll have to fit 2 at the bottom
by turning them. 

Once you've rolled up all the tortillas top the enchiladas with any
remaining sauce and scatter the cheese over the sauce.

Bake for 15-18 min., until they are heated through. 
Serve immediately.

Yes, this recipe has a lot of steps, but the end result is restaurant
quality.  You won't be disappointed with the results!

Monday, April 25, 2011

Meatless Mondays: Creamy Rice Casserole

We had a dinner party this past weekend for some of my husband's high school friends and I decided to make this.  Mainly because it cooked in the oven and looked super easy.  The hardest part is the roasting the chiles part, which my husband did so I didn't have to.

We roast our chiles on the grill, just until they are charred on all sides and then put them in a plastic bag for about 10 minutes.  Cut the chile lengthwise and lay flat, pull off the stem and scrape out the seeds.  Turn it over and scrape or peel off the skin.  Poblanos are very common and your grocery store should have them.  They are quite large so 2 should do it and I feel that extra chile never hurt anything.  Poblanos are super mild and have a really good flavor.

This is a great side dish or cook up some pinto beans and you have a complete meal which we've also done with the leftovers.

Today's Ingredients:
2 tablespoons butter
1/2 medium onion, chopped
1 1/2 cups corn kernels, fresh or frozen
1/2 cup chopped roasted mild green chile, poblano or New Mexican, fresh or frozen
3 cups cooked rice, preferably cooked in chicken stock or vegetable stock
4 oz. asadero or Monterey jack cheese, grated
1/2 cup Crema (see below), creme fraiche, or sour cream
3 tablespoons minches fresh cilantro
Salt to taste

Crema - I haven't ever made it before this weekend, but decided to try it.  It tastes pretty similar to sour cream, but not quite as tart and is thinner.  I can't find non ultra-pasteurized whipped cream so I made the Crema with it and it turned out good so use that if that's all you can find.  If you don't want to make crema, just use the sour cream - it will be just fine.  I'll be posting a Chicken Verde Enchilada recipe where you use the crema in a homemade verde sauce as well so make a double batch if you are going to try that recipe too.

Crema
1 cup whipping cream (preferably not ultra-pasteurized)
2 tablespoons buttermilk

In a small, nonreactive bowl, combine both ingredients.  Cover the bowl loosely, and let it stand at room temperature for 8-24 hours, until the cream is thickened and tart.  Stir the crema well, cover it, and refrigerate it.  Use it as needed.  Crema keeps for up to 10 days.


Preheat the oven to 350.  Grease a 9x13 pan.

Warm the butter in a skillet over medium heat.  Add the onion
and saute until soft.  Stir in the corn and chile and cook for about
5 minutes.

Transfer the corn and chile mixture to a large bowl.  Stir in the rice
and remaining ingredients.

Here it is all stirred together.

Add your Crema or creme fraiche or sour cream and mix well
together.

Spoon the mixture into the baking dish and bake, covered, for
25 min.  Uncover the dish and bake for 5 minutes more.

The poblano and the corn together with the rice is just so nice. 
Mine definitely needed salt so make sure you add a little to
your mixture.

Friday, April 22, 2011

Mexican Shredded Beef

I was watching a Tyler Florence show 4 years ago and he featured this Mexican shredded beef recipe.  It makes the best mexican beef ever.  We mainly use it in tacos, but have also used the leftover beef in quesadillas and burritos.  I also love this beef because it freezes so well and if we're having a full day I'll just pull it out in the morning and we have a great dinner.

Today's Ingredients:
2 pounds beef shoulder
S&P
EVOO
2 garlic cloves, smashed or minced
1 large onion, sliced
1 (28 oz.) can crushed tomatoes
1 tablespoon ancho chile pepper
1 tablespoon cayenne pepper
1 tablespoon ground cumin
3 bay leaves


Season all sides of the beef with a fair amount of S&P.  In a large
dutch oven or other heavy pot with a lide, heat 2 tablespoons olive
oil over moderately high heat.  Brown the meat on all sides. 

To get a good crust you need to put it in the pot and don't touch the 
meat for about 2-3 min. per side.  This will result in a good crust. 
If you are moving the meat around you can't get a good crust - which
is also sealing the juices in.  

I slice my onions and then I also cut them in half so they are like half
moons.  Works better in my opinion.

After you have browned the beef on all sides, add the onions to the
pot on the side of the beef and stir back and forth so they are
coated in oil and cooking nicely.  Cook for a few minutes and then
add the garlic.  Keep moving the onions and garlic back and forth
so they don't get burned.

Add the crushed tomatoes, 1 can (28 oz.) of water and the spices. 
There were kids coming over for this meal so I cut the cayenne in half. 
It really isn't overpoweringly spicy once it gets mixed into the tomatoes
and meat at the end, but cut it down some if you are nervous about
lots of heat.

I also already had diced tomatoes in my pantry so I just pulled
out 2 cans and pureed them in my food processor.  Works like a
charm.

Bring to a boil and then reduce heat and simmer with the lid on for 3
hours until the meat is fork tender.  Let meat cool in the liquid. 
Remove the bay leaves.

Take the meat out and shred and then add in some of the juices
and onions.

I didn't get a good shot of the meat in taco action because we had 2
families coming over for dinner and ate as soon as the meat was
shredded.


Thursday, March 31, 2011

Vegetarian: Quesadilla Casserole

This is really filling and we didn't even miss the meat.

Today's Ingredients:
3 tablespoons vegetable oil
¾ cup chopped onion
One 29-oz. can black beans, drained, ½ cup liquid reserved
1 ½ cups frozen corn kernels, thawed
½ cup chopped flat-leaf parsley
Five 10-inch flour tortillas
8 oz. monterey jack cheese, shredded
1 cup store-bought green enchilada sauce

Preheat your oven to 400.  Shred your cheese

 Prep your onion and cilantro, drain your beans - reserving 1/2 cup liquid
 In a bowl combine corn, parsley, and remaining black beans.
In a skillet, heat the oil over medium heat. Add the onion and cook for 5 minutes. Add 1 ½ cups black beans.
Mash into a chunky paste.
Stir in the reserved liquid.
This recipe calls for building these in a oven-proof skillet, but I just greased  a glass casserole dish and built my quesadilla in there.  I also had some 8-inch  tortillas to use up so I added another layer.

Place a tortilla in the skillet and spread with 1/3 cup mashed black bean mixture. Top with 2/3 cup corn-bean mixture and ½ cup cheese.

Repeat with the remaining tortillas, mashed black beans, corn-bean mixture and cheese.
You should really end with a tortilla and then the beans, corn and cheese, but I accidentally added 1 more tortilla and cheese.  It worked out great anyways.

Make sure to compress all the layers as your build them.
Bake until the cheese is melted and the casserole is heated through, about 30 minutes.  If needed, transfer to the broiler and cook for 1 minute.  Mine definitely didn't need that because I had added the last layer of just cheese on top of a tortilla.  It was definitely done and crisp enough.
Heat up your enchilada sauce and serve it on the side.  Kinda messy but so filling.

I didn't even up using all 8 oz. of the cheese and it was definitely cheesy enough.


Quesadilla Casserole Printable Recipe

Wednesday, March 9, 2011

Mexican Side Dishes: Red Rice and Guacamole

Mexican is one of my all time favorite meals and I love yummy sides to go along with them. I found this red rice recipes in a Mexican cookbook that has become a staple and the guacamole recipe was a Tyler Florence recipe that I tweaked some. Printable recipes are at the very bottom if needed.

I made some Salsa Chicken to go along with these sides in the crockpot and it's super easy.

Step 1-Put frozen chicken in your crockpot
Step 2-Dump salsa to amply cover your chicken
Step 3-Turn on low and walk away for 8-10 hours. Return to crockpot after said 8-10 hours, take chicken out, shred, add back in as much juice as needed. Done!

So easy! Great for chicken tacos, filling for burritos, quesadillas. I cooked too much salsa chicken so I just froze the leftovers (foodsaver=awesome!) and we like to use when we run out of time and need a quick dinner or when I just don't feel like cooking.

My red rice is much, much better than the crappy kind you get served at most Mexican restaurants. This guacamole recipe we've been using for almost 3 years. Once again, good homemade guacamole can't be beat and this is a good one! If you haven't ever made it except with a powdered mix you'll be hooked. We use the powdered mix (produce partners IS THE BEST powdered mix) sometimes as well, but it can't beat homemade. Please, please, please do not buy already made guacamole from the store. It really is super gross - in my humble opinion! I can't even stomach the stuff.


What sets my red rice apart from other recipes is using Ancho Chile pepper. It really isn't too spicy and adds a nice smokiness. A fresh ancho is referred to as a poblano pepper.


The Ingredients:
2 tablespoons olive oil - can use peanut oil or lard as well
1 medium onion, minced
2 garlic cloves, minced
1 cup uncooked rice
2 small tomatoes, preferably roma or Italian plum, chopped or 1/3 cup drained, chopped canned tomatoes
2 cups beef, chicken or vegetable stock - I always make mine with chicken stock
1 tablespoon ground ancho or New Mexican chile pepper (mild chile)*
¾ teaspoon salt

*Please find a mild chile pepper if you don't have ancho. I really think it's a good investment especially if you eat a lot of Mexican like I do. When I started looking for it a few years ago, I couldn't find it in the regular grocery store, but did find one eventually in a fancy store. Since then I found Penzey's and use theirs all the time and it is F-A-B-U-L-O-U-S. You can order it online at http://www.penzeys.com/.

Do not think you can substitute straight across chile pepper. It will be way too hot, if that's all you have, I would cut it way back.


Heat the oil over medium heat and saute the onion and garlic until softened.

*Side note. I used to think that if I didn't soften my onion enough at the beginning that it would be ok because the rest of the cooking process would soften the onion. I have found out through lots of trial and error that it usually isn't the case. The onion needs to be softened at the beginning for this rice or all you'll taste is onion and it will be overpowering. My point is, take the time to always soften your onion and you won't regret it.


Add the rice and tomatoes and sauté for another couple of minutes, stirring to coat all the grains of rice with oil.


Pour in the stock, sprinkle in the chile and salt, and bring to a boil. Reduce the heat to a simmer, cover the pan, and cook the rice for 15-18 minutes, until the liquid is absorbed.


Remove the pan from the heat and let the rice steam, for 5-10 minutes.

This picture is right after taking off the lid after it was done steaming. Most if not all the liquid should be gone. If you are not serving right away then transfer to another bowl and cover with foil to keep warm.
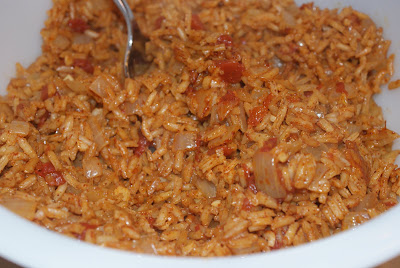

Fluff and serve. So good!

Homemade Guacamole
6 ripe avocados
3 limes, juiced - use real limes, lime juice from a bottle doesn't cut it
1 red onion, finely chopped
1 garlic clove, smashed then minced
2 serrano chiles, finely chopped - optional to leave the seeds or not
1 big handful fresh cilantro, about 1/2 cup finely chopped
EVOO
S&P

This recipe yields about 4 cups. Unless we have a big crowd over we usually halve this.


Halve and pit the avocados. Scoop out the flesh into a mixing bowl. Mash the avocados, leaving them still a bit chunky.


Cut off the tips of your serranos and then halve them. The more seeds you leave in the hotter the guacamole will be. We usually leave in seeds of 1 chile, but if you don't know your heat take them all out and you can adjust next time.

Make sure you wash your hands thoroughly after handling any chiles. They have oils on them that burn your eyes or nostrils and we've had mishaps on more than 1 occasion. If you are nervous about handling them, buy some non powdered plastic gloves and throw them away after handling.


Finely dice your chiles - see how little they are? The original recipe says to cut them in rounds, but I like my ingredients to be nicely chopped so they meld together well.


Same with the red onion. See how nice and small that dice is? Then you are biting into huge chunks of onion and having nasty onion breath - just nice guacamole breath instead.


Isn't fresh cilantro the best smelling stuff ever?


Add the remaining ingredients and fold everything together. Drizzle with a little olive oil, adjust seasoning with S&P and give it 1 final mix with a fork.


Lay a piece of plastic wrap tight on the surface of the guacamole so it doesn’t brown and refrigerate for at least 1 hour before serving.

We have found that if we have any leftover and want to use the next day either sprinkle with a little lime juice and immediately cover with plastic wrap on the surface or we use our foodsaver and suck the air out. We've even used that guacamole 4 days later after cutting open our food saver pouch and it tastes and looks like we just made it. Contact with the air is what makes guacamole look and taste gross.

Another trick - just scrape off the top layer of brown if you get it and it will be nice and green underneath. I did that on Monday (we made it Saturday) with leftovers and it was still delicious!

Red Rice Printable Recipe
Guacamole Printable Recipe